
Best Profile Projector: Essential Guide to Top-Rated Optical Comparators
2026-09-17
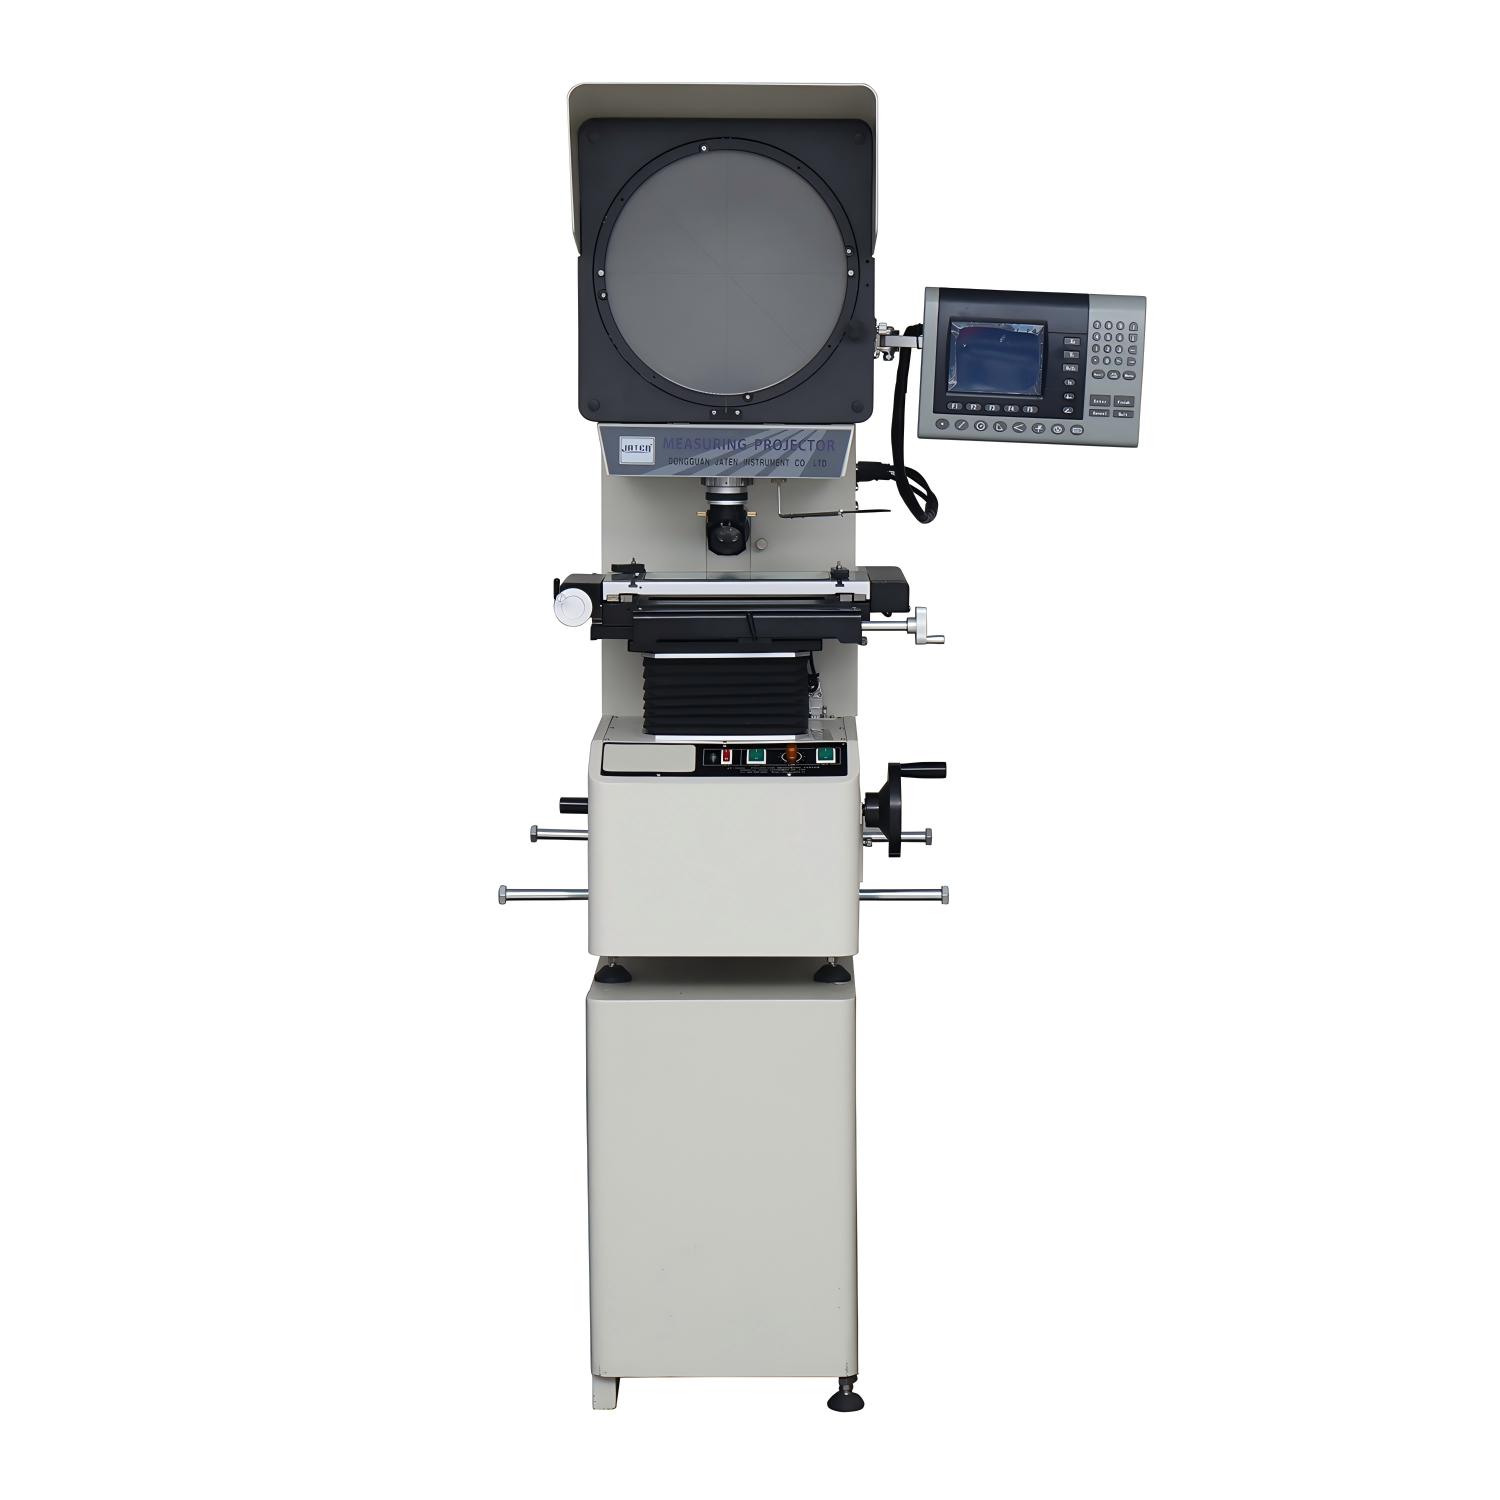
What if the difference between a perfect part and a rejected batch comes down to a shadow on a screen? That’s daily reality with profile projectors. But finding the best optical comparator isn't just about magnification charts or lumen counts—it’s about repeatability when the shop floor gets hot, and clarity when the edge is barely visible. This guide doesn’t rehash manufacturer datasheets. Instead, we’ve focused on actual performance criteria that matter in inspection rooms: optics, stage movement, illumination, and software that doesn’t fight you. And while comparing top-rated units, JATEN stands out for those who need reliable precision without overpaying for a name. Let’s start with what separates a comparator you can trust from one you’ll regret.
Why a Profile Projector Still Beats a Vision System for Certain Parts
For parts with complex silhouettes, sharp internal radii, or translucent materials, a profile projector still has a decisive edge. The magnified shadow on the screen is a direct optical representation of the part's contour, not a pixelated interpretation. If an edge is unclear, the operator adjusts the focus or lighting and sees exactly what the machine sees. A vision system, by contrast, must resolve that same edge through a camera and a chain of software filters. On a ground-glass screen, there's no question whether the software has correctly identified a boundary.
Reflective and machined surfaces often defeat a camera-based setup. The projector's collimated light can ignore minor surface finish variations and still project a clean, high-contrast outline. Small lots and one-off inspections matter too. Setting up a profile projector typically means placing the part on the stage and turning a few dials, with no need to write a measurement program, train a classifier, or spend an afternoon tuning illumination. When the part geometry changes tomorrow, the projector doesn't care.
Getting Sharp Edges: Lighting and Lens Tricks That Actually Work
Most people chase sharp edges by cranking up clarity or sharpening in post, but the real magic happens long before you open an editor. The way light rakes across a surface determines whether that edge reads crisp or mushy. A hard, directional source placed slightly behind and to one side will carve out a bright rim along the boundary, giving the eye a clear line to lock onto. If the light is too frontal, fine texture gets flattened and the edge loses its bite. Try moving a small strobe or even a bare bulb to a 45-degree back angle and watch how a once-soft object suddenly snaps into focus.
Then there is the glass you put in front of the sensor. Cheap zooms wide open are notorious for smearing edge detail because of spherical aberration and field curvature. Stopping down to f/5.6 or f/8 often fixes that, but only up to the point where diffraction starts stealing sharpness back. Prime lenses, especially older manual-focus ones with simple optical designs, tend to hold edge contrast better than modern zooms at the same aperture. A lens hood matters more than people think too—stray light bouncing inside the barrel lowers micro-contrast right where the edge lives. For outdoor work, a polarizer can cut haze on fine contours, making those edges look almost etched.
Reading the Fine Lines: Interpreting Screen Charts Without Guesswork
Screen charts often look straightforward until a thin trendline or a barely visible support level changes the whole story. Learning to read those fine lines means slowing down and treating each line as a proposed boundary rather than a fixed truth. Zooming in on the timeframe helps reveal whether a line has actually been touched, broken, or simply sketched over too much noise.
One practical habit is to mark only the lines that hold up across multiple touches. If a line needs more than a few exceptions to make sense, it is probably not a real level. Pay attention to the angle and spacing as well; steep lines tend to break earlier, while nearly flat lines often act as stronger zones. Comparing the current price action with the line’s history removes most of the guesswork.
Instead of treating every line as a decisive signal, look for confirmation in the candles nearby. A tiny wick through a line may not be a genuine break if the close returns inside the range. That distinction between an intra-session poke and a confirmed close is where careful reading pays off. Over time, you will notice that the fine lines become clearer, not because the chart changed, but because your eyes stopped forcing patterns that were never there.
From Analog to Digital: When an Upgrade Makes Sense
Replacing a perfectly working analog setup isn’t always the obvious move. But the moment you notice drift in calibration, fading signal clarity, or the rising cost of sourcing replacement parts, the equation shifts. A digital sensor array, for instance, can deliver consistent readings across temperature swings without the slow degradation that analog potentiometers are prone to. The upgrade stops being about novelty and starts being about not babysitting equipment.
The real tipping point often comes when your team spends more time interpreting noisy analog output than acting on it. Digital interfaces don’t just convert a signal; they let you log trends, set threshold alerts, and pull historical data without extra wiring. That shift from “what’s happening right now?” to “what’s been changing over the past month?” is where the practical payoff hides.
There’s also the hidden cost of compatibility. Older analog gear can work fine in isolation but becomes a bottleneck when you’re trying to connect it to modern controllers or cloud monitoring. If you find yourself building adapter after adapter just to keep a legacy dial in the loop, the upgrade has already paid for itself in saved engineering hours.
Avoiding the Five Most Common Setup Errors on Optical Comparators
Most comparator mistakes don’t come from the machine losing accuracy—they come from rushing the setup. People drop a part on the stage, twist the focus knob until something looks sharp enough, and call it good. That leads to edges that drift, measurements that shift between operators, and a nagging feeling that the numbers aren’t trustworthy. A deliberate setup routine eliminates almost all of that.
One of the first things to check is the stage and fixture. If a part isn’t seated flat or the stage isn’t clean, even a perfect optical system will give you a distorted profile. Then there’s the light source angle and intensity. Too much light blows out fine edges; too little makes them disappear. Spend an extra minute adjusting the illumination before touching any measurement tool.
Finally, verify magnification and focus against a known standard. Changing lenses without rechecking scale calibration and edge detection settings is a classic silent error. And don’t ignore thermal drift—let the comparator warm up, and handle parts with gloves if tight tolerances matter. These small habits matter far more than expensive upgrades.
Buying Used vs New: What to Inspect Before You Commit
When you're standing in a dealership or scrolling through an online listing, the choice between a brand-new car and a used one often comes down to more than just price. A new vehicle offers that unmistakable smell, a full warranty, and the latest tech, but it also depreciates the moment you drive off the lot. A used car, on the other hand, can be a smarter financial move if you know what to look for. The key is not to rush—take your time to inspect every inch, from the engine bay to the trunk carpet, because once you sign, it's yours.
Start with the basics that often get overlooked: check the tire tread depth unevenly worn rubber can signal alignment or suspension issues, and those costs add up fast. Open and close every door, hood, and trunk to feel for binding or misalignment, which might hint at past accident damage. Look under the floor mats for signs of water intrusion—a musty smell or rust spots could mean a leaky seal that will haunt you later. And don't trust the odometer alone; pull a vehicle history report and cross-check service records, because a low-mileage car with no oil change logs is a bigger gamble than a high-mileage one with a thick maintenance folder.
Finally, trust your senses but verify with a professional. If the seller seems eager to distract you from the engine's clicking noise or the transmission's delayed shift, walk away. An independent mechanic's pre-purchase inspection is worth every dollar—they'll catch hidden issues like a failing water pump or a patched frame. Remember, whether new or used, the goal is to drive away confident, not committed to a money pit.
FAQ
A profile projector throws a magnified shadow of a part onto a glass screen, letting you measure dimensions, angles, and radii without touching the workpiece. Machine shops, QC labs, and toolmakers rely on it for fast, non-contact checks of turned or milled profiles. If you deal with threads, gears, or odd contours, it beats hand tools by a wide margin.
It boils down to part orientation. A vertical projector has the lens above the stage, which suits flat items like stampings, gaskets, or boards. A horizontal unit puts the lens to the side, so you can mount shafts or cylinders between centers without wrestling them. If you inspect long turned parts most days, go horizontal. If your workpieces sit flat, vertical is the easier choice.
For everyday machined parts, 10x and 20x cover almost everything. A 10x lens shows the whole profile at once, while 20x lets you zoom into thread forms or small radii. Magnifications above 50x sound impressive but they cut your field of view down to a tiny window, which makes aligning the stage slow. Start with 10x and only add higher power when a specific tolerance forces it.
Real accuracy comes from the mechanical bones, not the display. A heavy cast-iron base, precision-ground stage travel, and a lens with sharp edges to the field beat a colorful digital readout every time. Before buying, run a known standard and check for stage play or drift after warm-up. A mediocre machine will show blurry edges or lose calibration within a week.
Only if you actually save and use the digital data. Edge detection and automatic measurement cut operator error dramatically, especially with several people sharing the machine. But for occasional checks or a job shop that measures one-off parts, a manual optical comparator is far cheaper and just as accurate for basic profiles. The decision hinges on how often you need reports or stored results.
Clean the screen and lenses with a puffer and proper lens tissue, never a dirty rag. Keep the stage slides lubricated and free of chips, and verify magnification against a glass scale monthly. Store the unit out of direct sun and away from vibration, which causes more drift than most people realize. Ignoring the reference scale until readings go bad is a common and expensive habit.
For 2D profiles and simple geometry, a comparator often beats a CMM on speed and cost. Checking threads, radii, or comparing a part to an overlay chart is fast and intuitive. But it cannot measure depth, three-axis perpendicularity, or complex curved surfaces. A CMM handles those jobs. Many small shops keep both: the projector for quick visual inspections and the CMM for full dimensional reports.
They buy too much magnification they never use, ignore the working distance for tall parts, or grab a flimsy unit with sloppy stage bearings. Some assume a digital readout guarantees accuracy, which it doesn't. A used name-brand projector with a fresh calibration often beats a new generic model. Always test with your own parts and look for image sharpness at the edges before paying.
Conclusion
A profile projector still earns its place on the bench when you need to check turned, milled, or stamped profiles with threads, chamfers, or tiny radii that a vision system tends to blur or misinterpret. Getting crisp edges comes down to more than focus. Collimated green light and an adjustable iris at the condenser reduce flare, while a low-angle surface illuminator highlights step features that transmitted light washes out. For interpreting screen charts, start by confirming magnification with a glass scale, then read radii against the center cross and use the vernier lines only after the shadow is dead sharp. Parallax disappears when your eye stays centered over the screen, not off to one side.
Moving from analog to digital makes sense when you need stored measurements or SPC data, but a basic screen with a 0.0001-inch micrometer stage still works for quick pass/fail checks. Before any upgrade, fix five setup errors that ruin readings. A workpiece not seated flat on the glass, wrong lens magnification, forgetting to focus the crosshair reticle, an off-center screen chart, and ignoring warm-up time for the lamp all throw off measurements. When buying used or new, inspect the stage for side play, check the screen glass for scratches at the center, ask for a recent calibration certificate, and run a known standard like a pin gauge. Top-rated comparators combine a stiff stage, quality telecentric optics, and simple chart swaps, so the tool stays useful for both old-school layout work and digital documentation.
Contact Us
Contact Person: Volien
Email: [email protected]
Tel/WhatsApp: +86 18029161762
Website: https://www.jatentech.com/